Tel : 86-0755-89999957 /
  Email : colin@aohuadz.com


Is Your Waterproof Connector Failing? A Step‑by‑Step Diagnosis and Repair Guide
You installed a waterproof connector. It worked fine for months. Then one day, your equipment starts acting strangely – intermittent signals, blown fuses, or complete shutdown.
Is the connector the culprit? And if so, can you fix it, or do you need a new one?
At AOHUA, we’ve received hundreds of “failed” connectors for analysis. Many could have been saved with a simple repair. Others were beyond hope – but the damage could have been caught earlier.
This guide will help you diagnose connector problems in the field, perform temporary fixes, and decide whether to repair or replace.
Part 1: 7 Signs Your Waterproof Connector Is Failing
Don’t wait for a total blackout. Watch for these early warning signs.
| Sign | What It Looks/Feels Like | Likely Cause |
|---|---|---|
| 1. Intermittent signal | Device works sometimes, fails after rain or temperature change | Moisture inside causing intermittent shorts |
| 2. Condensation inside housing | Fog or water droplets visible (if housing is transparent) | Seal compromised – water vapor got in |
| 3. Corrosion on pins | Green or white powdery residue on metal contacts | Salt or moisture ingress, often old damage |
| 4. Increased resistance | Device heats up at connector, voltage drop measured | Oxidation or loose contact inside |
| 5. Stiff or cracked seal | Gasket feels hard, brittle, or has visible cracks | UV or chemical damage, age |
| 6. Housing discoloration | Yellowed, chalky, or crazed plastic | UV degradation – seal may still work but housing weak |
| 7. Water drips out | When you open the connector, water runs out | Severe ingress – connector has been submerged while unmated or seal failed completely |
If you see any of these, stop using the equipment immediately if safe to do so. Then proceed to diagnosis.
Part 2: How to Diagnose the Exact Failure Point
Before you repair or replace, you need to know where the water got in. Here’s a simple field‑test procedure.
What you’ll need:
-
Clean, dry cloth
-
Compressed air (can or small compressor)
-
Magnifying glass or bright light
-
Multimeter with continuity and resistance modes
Step 1 – External visual inspection
Check the connector while still assembled (power off!):
-
Cable gland: Is the cable jacket fully inserted? Any gaps or cracks?
-
Coupling nut: Is it fully tightened? Any cross‑threading?
-
Housing: Any cracks, chips, or warping?
Step 2 – Open and dry
Carefully unscrew the connector. Remove the insert if possible.
-
Wipe away any visible moisture.
-
Blow dry with compressed air (low pressure) for 30 seconds.
-
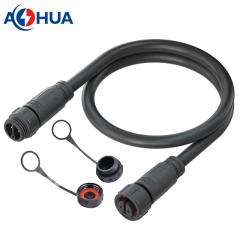
Inspect the O‑ring or gasket. Does it sit flush in its groove? Is it deformed?
Step 3 – Seal test (quick field method)
-
Reassemble the connector without the cable (if design allows).
-
Close it fully.
-
Submerge the empty connector in a cup of water for 10 seconds.
-
Remove, dry outside, then open. Any water inside? If yes, the seal or housing itself leaks.
Step 4 – Contact resistance check
-
Use multimeter in resistance (ohms) mode.
-
Measure from each pin to its corresponding wire end on the other side.
-
A good connection: <0.5 ohms.
-
A corroded connection: >2 ohms or fluctuating.
Step 5 – Insulation resistance (if you have a megohmmeter)
-
Measure between each pin and the housing (or shield).
-
Reading <10 MΩ suggests moisture contamination inside the connector.
Part 3: Temporary Field Fixes (Emergency Only)
Sometimes you can’t shut down for long. These are temporary fixes to get you through a day or two until a proper replacement arrives.
| Problem | Temporary Fix | How Long It Lasts |
|---|---|---|
| Wet but not corroded | Blow dry with compressed air, then wrap connection with self‑fusing silicone tape (rescue tape) | Up to 1 week if dry |
| Loose gland | Tighten firmly. If still loose, wrap cable with a layer of electrical tape to increase diameter, then re‑tighten | Days to weeks |
| Cracked housing | Clean and dry, then apply two‑part epoxy putty over crack. Let cure 1 hour before use | Weeks to months – but replace soon |
| Corroded pins | Clean with fine sandpaper (1000 grit) or a pencil eraser. Apply dielectric grease before re‑mating | Weeks – corrosion will return |
Important: These are NOT permanent solutions. A temporary repair that works for a month might fail catastrophically later. Always order a proper replacement connector and schedule a permanent fix.
Part 4: Repair vs. Replace – A Decision Flow
Not every failed connector can be repaired. Use this flow to decide.
| Condition | Can You Repair? | Recommended Action |
|---|---|---|
| Only the O‑ring is cracked or flattened | Yes | Replace seal (if spare available). Order replacement seals for future. |
| Pins have light surface oxidation | Yes | Clean contacts with contact cleaner and a soft brush. Apply dielectric grease. |
| Housing has a small hairline crack (non‑structural) | Possibly | Clean, dry, epoxy seal. Monitor closely. Better to replace. |
| Housing cracked through, or missing pieces | No | Replace entire connector. |
| Pins heavily corroded (pitted or missing plating) | No | Replace – cleaning won’t restore low resistance. |
| Cable has water wicking inside (water dripping from cut end) | No | Cut back cable to dry section and re‑terminate, or replace entire assembly. |
| Internal potting (molded connector) has water inside | No | Cannot be opened. Replace whole assembly. |
Our rule: If the repair takes more than 30 minutes of skilled labor, or if the connector has been wet for more than a week, replace it. The cost of a new connector is almost always less than the cost of repeated failures.
Part 5: How to Prevent It From Happening Again
Once you’ve diagnosed and fixed the issue, take steps to avoid the same failure.
1. Upgrade your seal material
If the old seal was standard NBR, switch to silicone or Viton for better temperature and UV resistance.
2. Add strain relief
Many failures start with cable tugging. Add a cable clamp within 150mm of the connector.
3. Use dielectric grease
A small amount on the pins and O‑ring helps repel moisture and lubricates assembly. Do NOT use on high‑voltage power contacts (>600V) – but for signal and low voltage, it’s excellent.
4. Check torque periodically
For vibration‑prone applications, put a torque check on your monthly maintenance list.
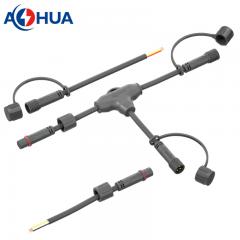
5. Consider pre‑assembled harnesses
If field failures keep happening despite good installation, switch to factory‑assembled harnesses. They eliminate most installation variables.
Real Customer Example: A Diagnosis That Saved $8,000
A marina customer called us in a panic. Their boat lift control system stopped working – just as they were about to haul out a $50,000 yacht. They suspected the waterproof connector at the motor.
We guided them through remote diagnosis:
-
Visual check: No visible cracks.
-
Opened connector: Water droplets inside, but pins looked clean.
-
Seal test (empty): No leak – so the seal was fine.
-
Found problem: The cable gland had been over‑tightened, deforming the rubber grommet. When the cable moved, a tiny gap opened.
Fix: They replaced only the gland grommet (a 2 + 20 minutes. They avoided a $8,000 service call and hauled the yacht safely.
Lesson: Diagnosis matters. Don’t assume the whole connector is bad.
When to Call a Professional (or Just Buy a New One)
If you’ve gone through this guide and still can’t find the issue, or if the equipment is mission‑critical, don’t gamble.
-
Send the failed connector to us – we offer free failure analysis for customers. We’ll tell you exactly what failed and why.
-
Order a direct replacement – we keep tooling for most series for 5+ years.
-
Upgrade to a more robust series – if this is the third failure in the same spot, it’s time to move up to IP69K or metal housing.
FAQ – Quick Answers for Field Technicians
Q: Can I use WD‑40 to clean connector pins?
A: No. WD‑40 leaves an oily residue that attracts dirt and can degrade some plastics. Use electrical contact cleaner (deoxit or CRC) or isopropyl alcohol.
Q: How long does dielectric grease last?
A: In a sealed connector, it can last years. Reapply if you open the connector for inspection.
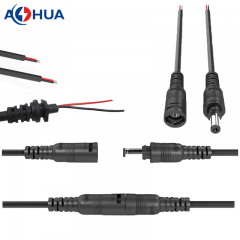
Q: Can I replace just the cable, not the whole connector?
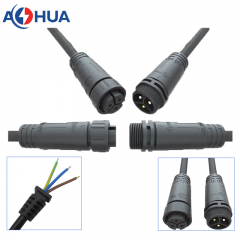
A: For field‑installable connectors, yes – you can re‑terminate a new cable. For overmolded assemblies, no – you need a new harness.
Q: My connector is IP68 but still gets condensation inside – is it defective?
A: Not necessarily. Condensation can form from trapped humid air during assembly. Open it on a dry day, let it air out for an hour, then reassemble. If condensation returns, you have a leak.
Q: Do you sell seal replacement kits?
A: Yes. For all our standard series, we offer individual O‑rings, gaskets, and cable grommets. Contact our spares department with your part number.
Final Word: Small Problems Don’t Heal Themselves
A slightly loose gland, a tiny crack, a bit of corrosion – they only get worse. The connector that “still works most of the time” will fail completely on the worst day, at the worst moment.
Use this guide to catch problems early. And when you need a reliable replacement – or simply want to stop worrying – we’re here.
Download our one‑page “Connector Troubleshooting Checklist” – a printable PDF you can keep in your toolbox.
[Click here to download the checklist (PDF)] – no registration required.
Need a replacement connector fast?
[Browse our most popular field‑repairable series] or [Contact support for urgent orders].
How to Use This Article on Your Website
-
Replace bracketed text with your actual links and series names.
-
Create a downloadable PDF of the “Connector Troubleshooting Checklist” – a simple table of signs, checks, and fixes. Offer it as a lead magnet or free download.
-
Add real photos of corroded pins, cracked seals, condensation inside a transparent connector – these images greatly increase engagement.
-
Internal links: Link “field‑repairable series” to your product category page for solder/crimp connectors. Link “Contact support” to your contact form.
-
SEO keywords:
how to fix waterproof connector,waterproof connector troubleshooting,connector corrosion repair,water ingress in connector,dielectric grease for connectors,connector seal replacement.

 86-0755-89999957
 colin@aohuadz.com